
TL;DR: The quick version
- Use lighter cabinets on the perimeter and darker tones on the island or lowers for balance.
- Choose white paints that match your countertops, backsplash, and flooring undertones.
- Dark grey works best on islands and lower cabinets, where it can handle scuffs and anchoring duties.
- White kitchens with white appliances still look sharp if you add contrast through islands, hardware, and texture.
- For layout changes, new lighting, or outlets in your island, check local renovation and permit rules first.
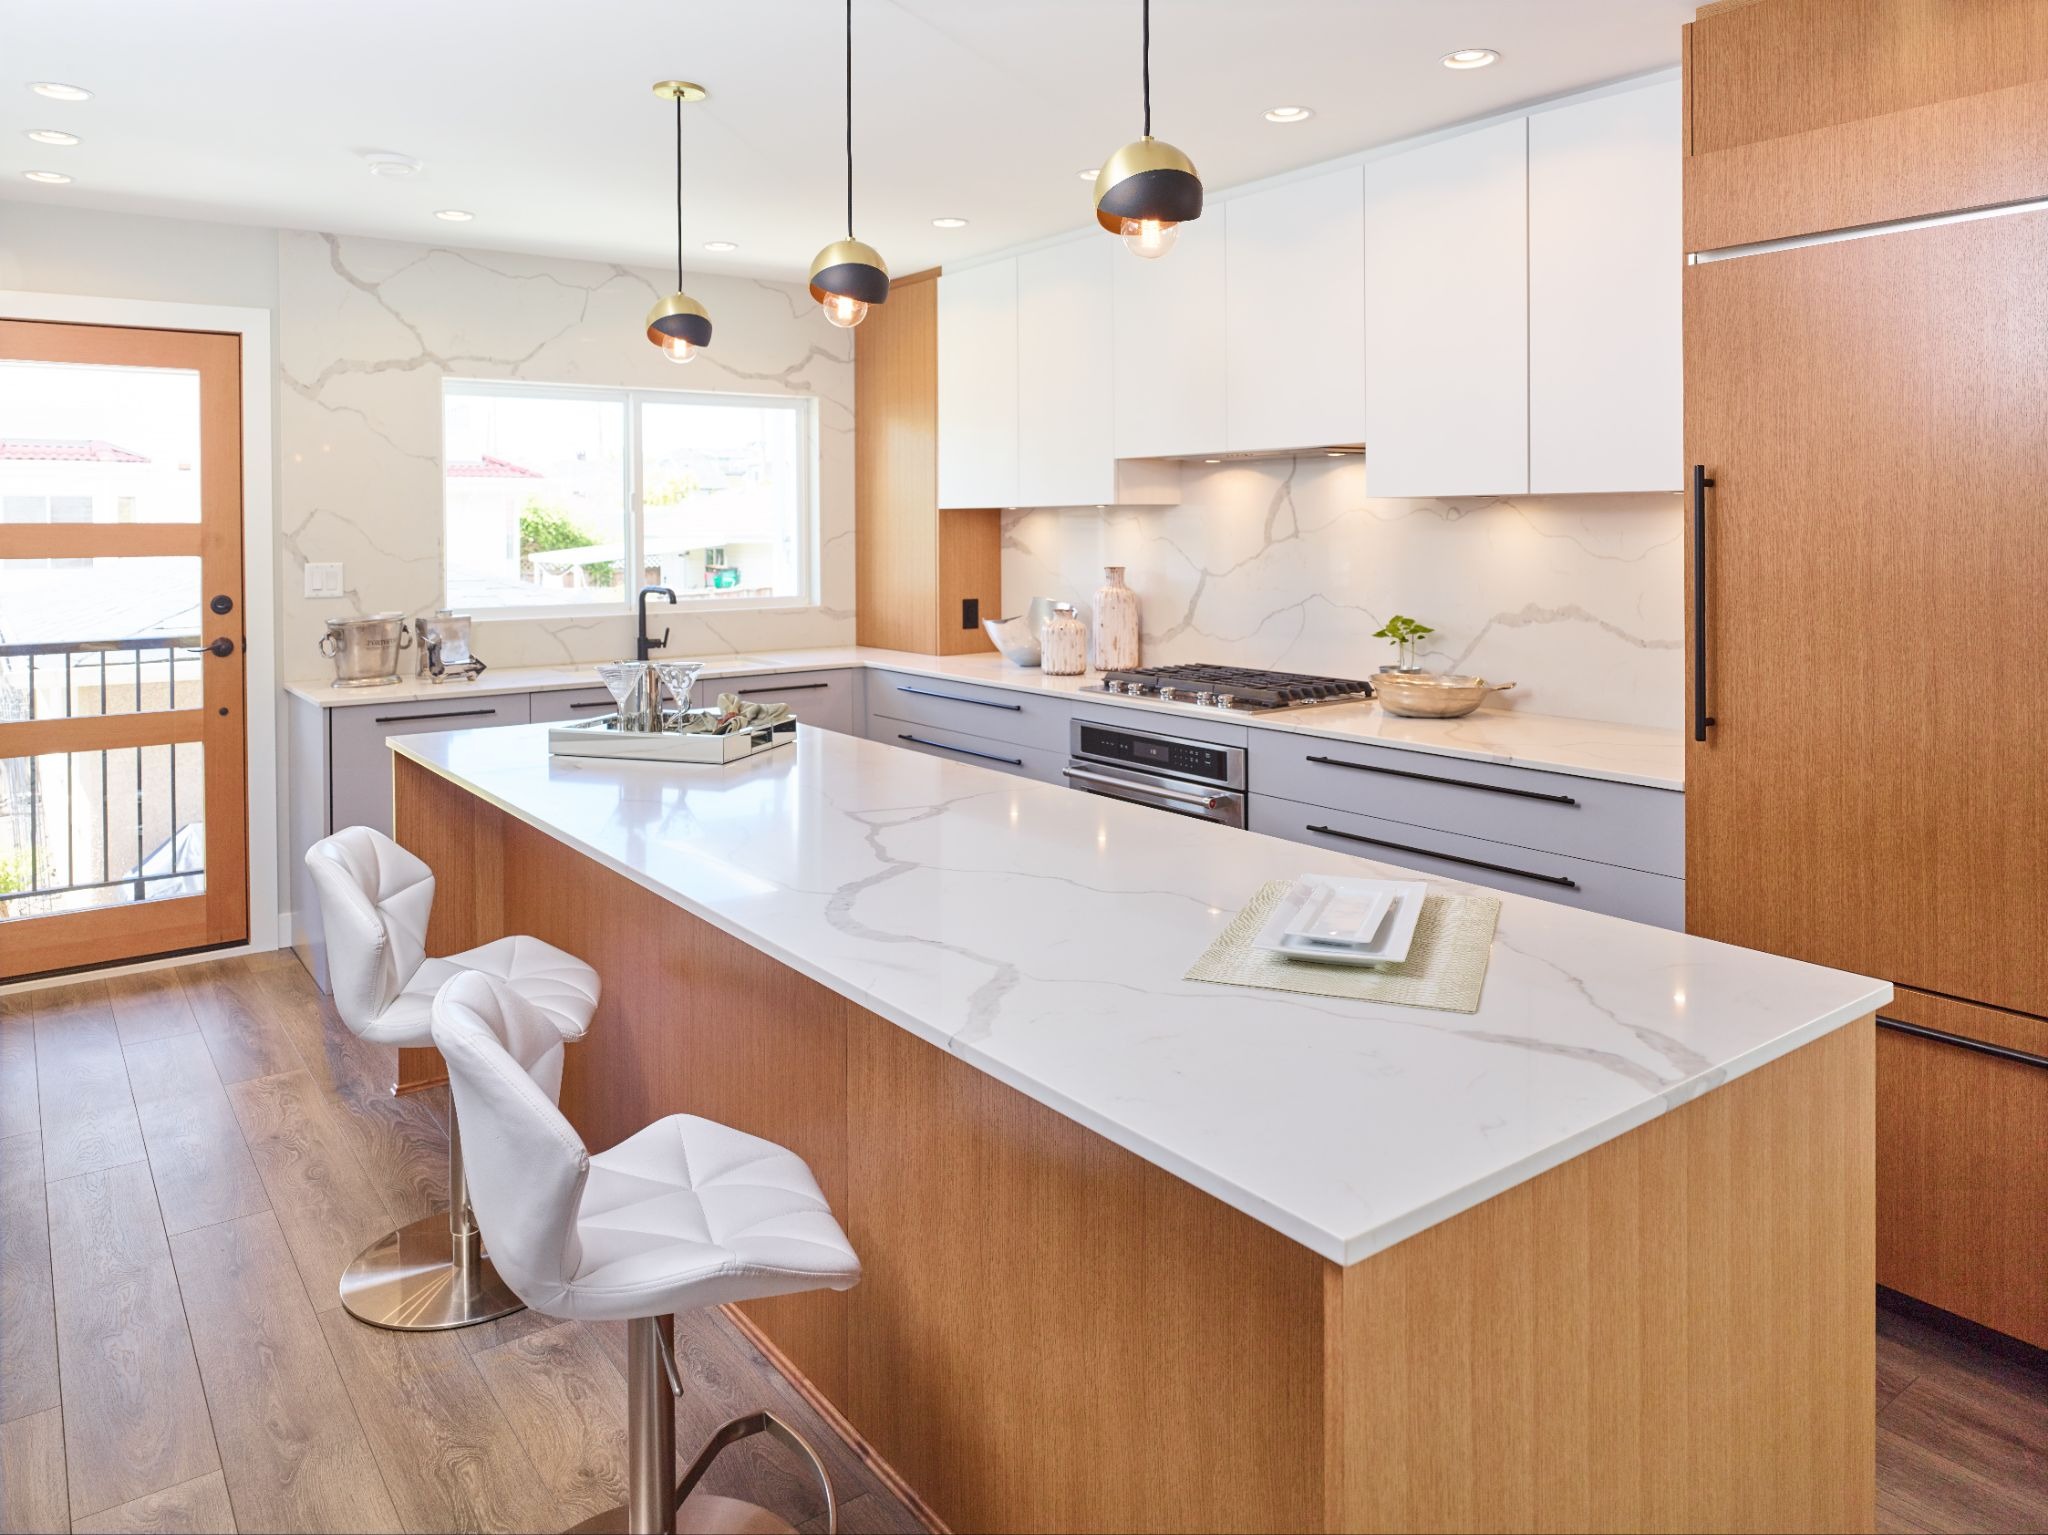
On real renovation projects, the details that look effortless in photos usually come from a lot of careful decisions behind the scenes. Over the last few years, one of the kitchen cabinet trends our team keeps coming back to is pairing soft white perimeter cabinets with a darker island or lower run of cabinetry.
The mix keeps busy family kitchens bright enough for Vancouver’s grey days while giving the room some substance so it never feels washed out. Done well, this combination works with modern condos, character homes, and everything in between.
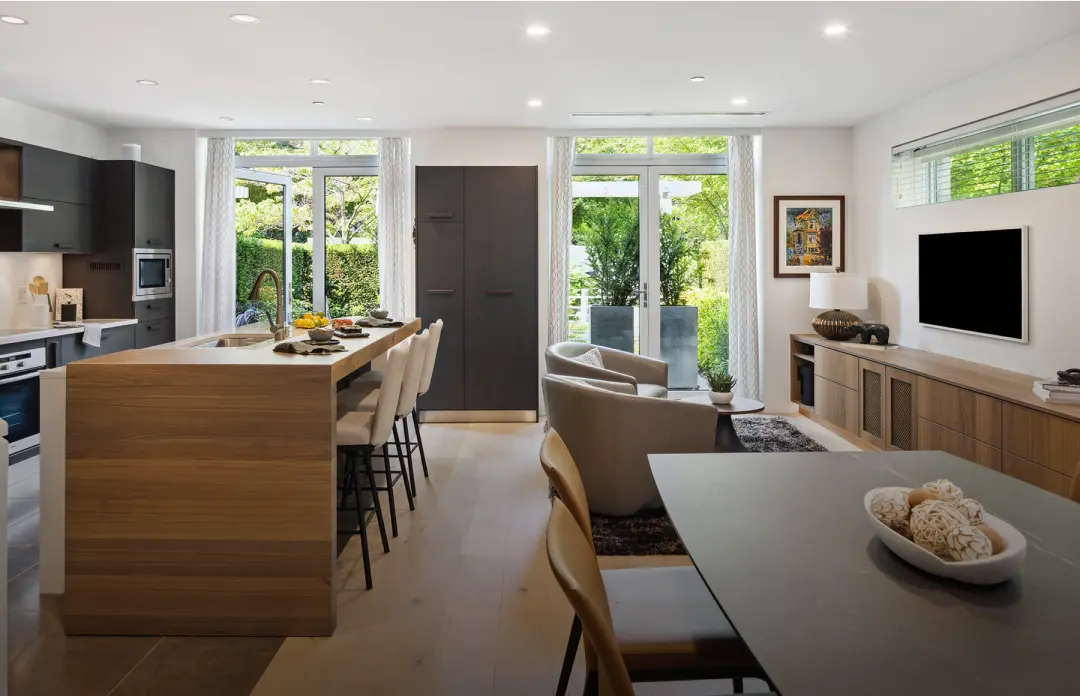
A contemporary kitchen showing white perimeter cabinets balanced by a dark grey island and lowers.
In this article, we’ll walk through how we approach that white-and-grey balance on actual kitchen renovation projects across Metro Vancouver, and share the questions we ask clients before committing to colours, finishes, and layouts.
Why mixing white and dark grey cabinets works so well
All-white kitchens still show up in almost every inspiration folder we see. The twist we’re seeing on more recent projects is contrast: white on the walls and uppers, with darker lowers or a charcoal island. In a city where winter light can feel a bit thin, this gives you the brightness you want without a “wall of white boxes.”
From a practical point of view, darker lower cabinets hide the scuffs from kids’ shoes, pet bowls, and vacuum bumps. White uppers keep the eye lifted and reflect what natural light you do have. That balance becomes even more useful in older Vancouver homes with modest window sizes.
“White where you want light, dark where you need durability” is a simple rule of thumb our designers repeat often.
If you’re changing not just finishes but also your layout, it can help to sketch cabinet zones over a rough floor plan, then overlay colour ideas. Our team typically folds this into the early Planning & Design stage of a full home or kitchen renovation.
Start with the layout: where white vs dark belongs
Colour choices work best once the functional layout is settled. That’s where homeowners often get stuck: they’re clicking through “dark grey cabinets kitchen” galleries before answering basic questions about prep space, traffic, and storage.
An open-concept layout where white perimeter cabinets frame the room and a darker island anchors the centre.
Perimeter cabinets vs. kitchen islands
A go-to formula on our projects is:
- White perimeter cabinets (especially uppers) to frame windows and reflect light.
- Dark grey island to anchor the room, tie into the flooring, and take on daily wear.
In an open concept renovation, the island often faces living or dining areas. Giving it a deeper tone helps it read like a piece of furniture instead of “more kitchen,” which many homeowners appreciate when they’re relaxing in the evening.
Upper vs. lower cabinets
In tighter galley and condo kitchens without an island, we often keep:
- Uppers in white to prevent a tunnel effect.
- Lowers in mid to dark grey to create a base line that feels steady rather than top-heavy.
For clients working with us on a free design–build consultation, we usually bring both cabinet finish samples and countertop swatches to check how the tones behave in their actual daylight and evening lighting.
Choosing white kitchen paint colors that feel warm, not sterile
Picking “the right white” makes many homeowners more nervous than choosing the dark grey. That’s because white is reacting to everything around it: countertops, backsplash, flooring, even north-versus-south exposure.
Warm vs. cool whites in real kitchens
As a starting point, we usually talk through three broad families:
- Soft, warm whites with a hint of cream or beige. These pair well with oak floors, warm quartz, and brass hardware.
- Clean, neutral whites that sit between warm and cool. Helpful when you want flexibility with decor over time.
- Cooler whites with grey or blue undertones. These can feel sharp and modern, but in grey Vancouver light they may drift toward chilly if not balanced carefully.
Many designers lean on paint lines from brands like Benjamin Moore and Sherwin-Williams, which publish useful guidance on undertones and light reflectance for popular cabinet whites. Rather than chasing a specific name from the internet, we suggest testing two or three contenders right next to your countertops and backsplash.
How do you test white paint in your kitchen?
A simple process our clients like:
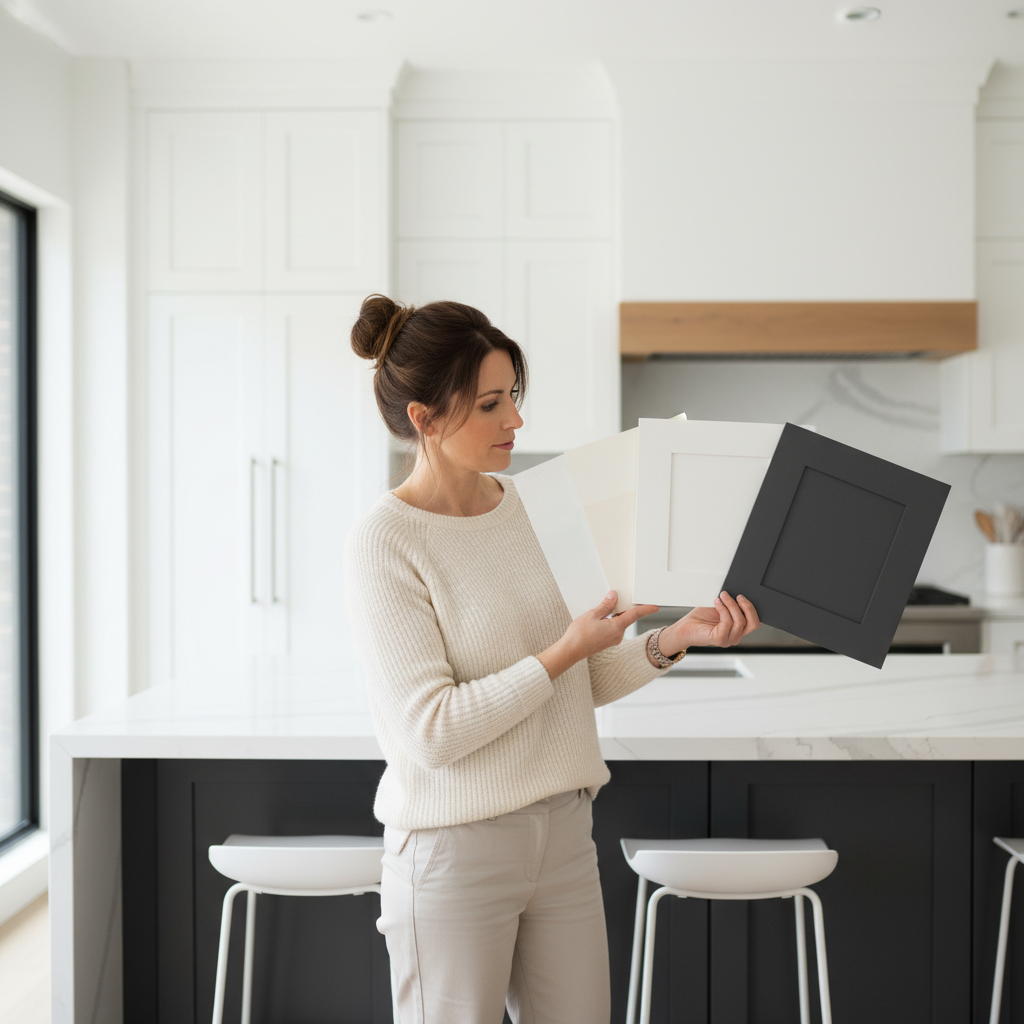
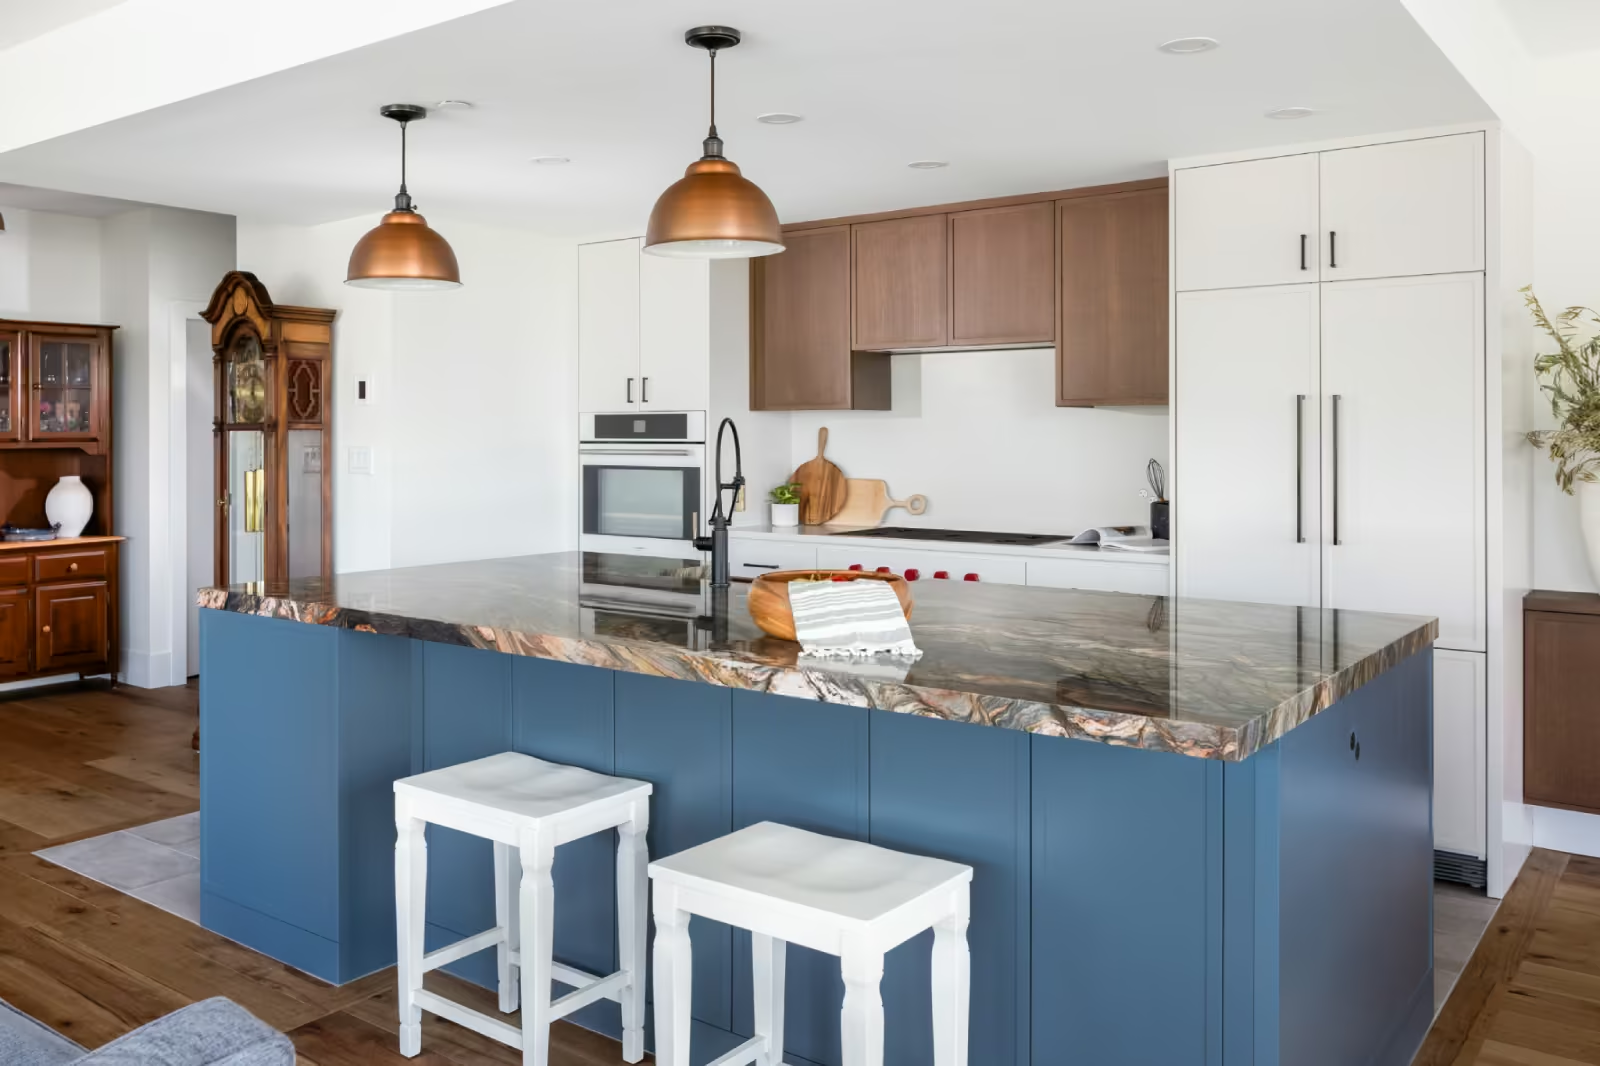
Testing several white paint and cabinet samples against dark grey cabinetry in a real kitchen setting.
- Pick 2–4 white kitchen paint colors that match the undertones of your counters and floor.
- Paint them on large sample boards or primed off-cuts of cabinet material.
- Move those samples around the room over a couple of days—beside the fridge, near the window, along the backsplash line.
- Check them in the morning, midday, and evening under your actual light fixtures.
By the time construction starts on a design–build project with us, paint choices are usually locked in because we’ve walked through this testing step together.
Dark grey cabinets and kitchen islands that ground the room
Once the white is set, the darker tone falls into place more easily. Most clients don’t want black, but they do want enough depth that crumbs and fingerprints don’t show every hour of the day.
How dark should your grey be?
For busy family kitchens we often steer people toward:
- Charcoal or slate greys that still show wood grain or subtle variation.
- Mid-greys if the room is small or north-facing, to keep it from feeling heavy.
- Greys that repeat tones already in the stone veining, window frames, or flooring.
On a recent condo project, for example, we finished tall pantry cabinets and the island in a deep espresso-grey while keeping nearby dining built-ins lighter. You can see that contrast in our Broughton condo “culinary hub” renovation, where darker cabinets sit comfortably beside white elements and light limestone flooring.
Finishes, sheens, and durability
In high-traffic zones, we usually recommend:
- Spray-finished cabinet doors from a millworker or cabinet shop rather than brushing doors by hand.
- Low-sheen or matte finishes on dark grey cabinets to keep fingerprints from screaming for attention.
- Durable hardware that feels comfortable and repeats your darker tones in small doses.
If your project involves moving the island, adding outlets, or changing venting, a professional should review permits and local code. For Vancouver homeowners, the city’s own renovation guidance explains when building, electrical, and plumbing permits are needed for kitchen work.
White kitchens with white appliances: how to keep things interesting
Not everyone wants stainless or panel-ready appliances. We still see plenty of white fridges and ranges, especially in strata buildings where owners upgrade the kitchen but keep functioning appliances a little longer.
The worry is that white cabinets plus white appliances will look flat. The good news: mixed cabinetry colours help a lot.
Smart strategies for white appliances
- Keep white on the wall behind appliances. Let the fridge and range blend into white perimeter cabinets and wall colour.
- Use a dark grey island or lowers opposite. This shifts the eye toward the centre of the room and creates a calm, two-tone composition.
- Add texture in the backsplash. Think soft white subway tile with a hand-made feel, or a quartz backsplash that carries your countertop veining upward.
- Choose hardware with presence. Black, aged brass, or brushed nickel pulls can bridge between white boxes and darker accents.
We often share NKBA kitchen planning resources with clients so they can see how visual choices like this layer over solid layout fundamentals such as clearances and work zones.
Real Vancouver projects that use this cabinet mix
In our own portfolio of Vancouver kitchen renovations, you’ll see this white-and-dark pairing repeated in different ways depending on the home.
A family-friendly kitchen where white cabinets and a dark grey island work together in daily life.
Open-plan family kitchen with charcoal island
In one Burnaby home, the owners wanted a brighter, more social kitchen that opened to the backyard. We removed interior walls as part of a larger main-floor renovation, then:
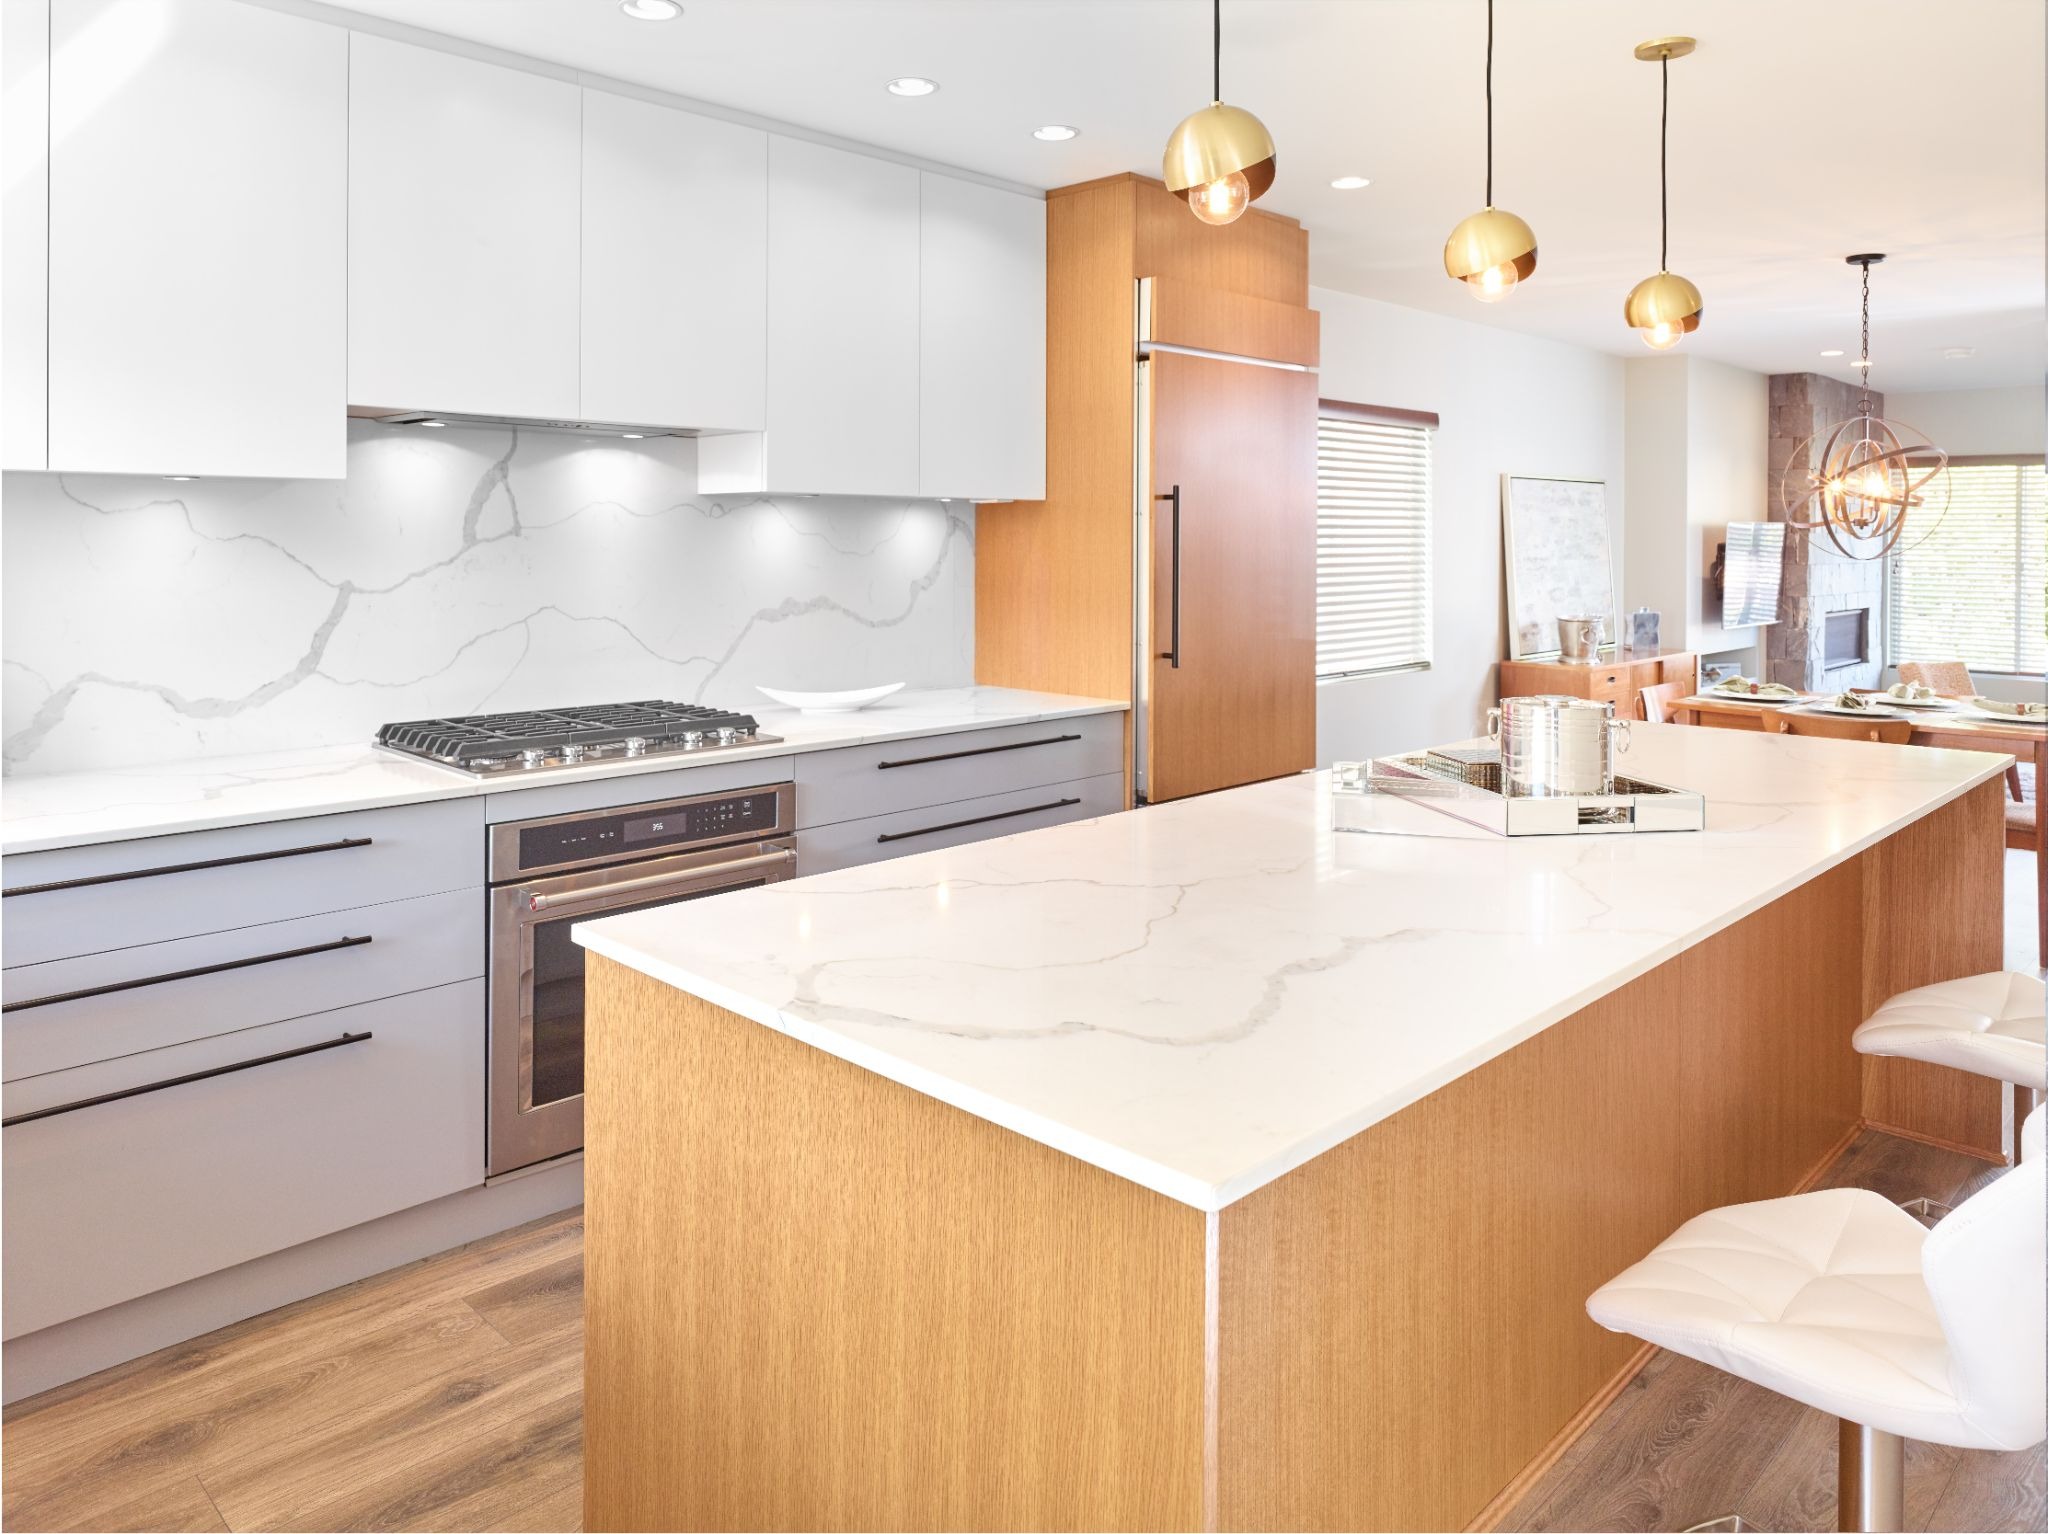
- Ran warm white cabinets and counters along the exterior wall.
- Introduced a charcoal island with seating, matching the window frames and fireplace surround.
- Used warm oak flooring to bridge the white and grey elements.
The result feels bright even on rainy days, but the darker island keeps the space from feeling like a hospital corridor of white.
Compact condo with white appliances
In a downtown condo where the client kept existing white appliances, we:
- Specified a soft, creamy white for upper cabinets and surrounding walls.
- Choose mid-grey lowers that tie into the engineered flooring.
- Used slim black pulls and a deeper grey faucet for subtle repetition.
The eye reads the space as layered and intentional, not dated, even though the fridge and range aren’t the latest models.
Practical tips from our design–build team
After dozens of kitchens that combine white and grey, a few patterns show up again and again. Here’s a simple checklist you can work through at home or with your contractor.
The “Base, Contrast, Connect” checklist
- Base: Pick the main white that respects your countertops, backsplash, and flooring.
- Contrast: Choose a dark grey for the island or lower that repeats at least one tone from your flooring, window frames, or furniture.
- Connect: Use hardware, lighting, and bar stools to echo both white and grey so the room feels intentional.
Other details that make this look work
- Lighting: Plan for layered lighting—pot lights for overall brightness, pendants over the island, and under-cabinet lights for tasks.
- Floors: Medium wood tones often play nicely with both white and grey. Very dark floors plus dark lowers can feel heavy; very light floors plus bright whites may feel washed out.
- Backsplash height: Running tile to the ceiling behind a hood or window can add texture without adding another colour.
- Timeline: Cabinet lead times and spray finishes take coordination. On our projects, cabinet and paint decisions are locked in early during the Planning & Design stage of our five-step process.
When to talk with a design–build contractor
If you’re simply repainting existing cabinets, you may be able to work with a painter and a good local paint supplier. Once you start moving islands, changing appliance locations, or opening walls, it helps to have a team that can coordinate design, permits, trades, and construction as one package.
Our free consultation is often where homeowners show us their inspiration photos, ask about white kitchens with white appliances, and sort through how far to go: cosmetic refresh, partial renovation, or full main-floor reconfiguration.
This article is for general information only and doesn’t replace project-specific advice. Structural changes, new plumbing, gas, or electrical work should be reviewed and completed by licensed professionals in line with local building codes and permit requirements.
Key takeaway
Mixing white kitchen paint colors with dark grey cabinets and islands isn’t just a passing fad—it’s a practical way to keep your kitchen bright, grounded, and suited to daily life in Vancouver. Start with layout, choose whites that work with your fixed finishes, then add contrast and connection through dark cabinetry, hardware, and lighting.
When you’re ready to see how this could look in your own home, you can request a free consultation and talk through options with our design–build team.